Your Project
Monitoring performance and Sampling
Watch a scientist explain why and where to sample water quality relating to your project:
Why
Sampling water quality is an important part of your inspection and monitoring programme. It enables you to:
- Understand what is happening upstream of your project
- Understand the effects of your project on water quality at and downstream of the point of discharge
- Show Environment Canterbury’s Compliance Monitoring staff that you are monitoring performance and the effects of your project on the waterway
- Look for opportunities to improve ESC by knowing how erosion and sediment control tools are performing and adjusting or improving them.
How
One option is to pay an external professional to do the sampling for your project. However, there are many benefits to working with your own staff to do it. Doing this involves:
- Training staff so they are competent to do the sampling. See the videos in this toolbox to demonstrate the basics of water sampling techniques.
- Having a roster of staff to do it, so the skills are spread across the team and team members can help each other get it right.
- Including all trained staff in the sampling roster so that they practise their skills.
- Giving them training refreshers.
- Including equipment maintenance in the roster, so that the sampling equipment is kept clean and stored appropriately so will give reliable results.
- Storing sampling records in a suitable and easily accessible place, so that any member of the team can see how the project is performing and contribute ideas for improvement.
An added advantage to this approach is that it builds team involvement and enthusiasm for the performance of the project—this type of staff engagement is known to contribute directly to projects performing well both environmentally and financially.
Where
These steps show where to sample, and the usual order for doing so. Always collect the samples in the same location/s. Providing a long reach sample collection device (a sampling pole) may help keep staff safe.
- Upstream of the point where treated water from your project is released. This should be the cleanest point with respect to water quality, and done first. However, you might be at the head of the catchment so discharge from your project may be the first water to go into the stream.
- Downstream of the mixing zone of the point of discharge.
- The discharged water from sediment control tools—eg from the outfall of the decanting earth bunds or sediment retention ponds—before it goes into a receiving waterway. Bearing health and safety needs in mind, aim to collect the sample as close as possible to the discharge point from the established treatment system (floating decant, perforated snorkel, spillway, etc).
- The inflow of dirty water to DEBs and SRPs.
What is the mixing zone?
A mixing zone is a designated area of a stream, river, lake or artificial watercourse into which contaminated (e.g. sediment-laden) water is permitted to empty. The wastewater mixes, usually by natural means, with cleaner water. Water quality standards are permitted to ‘exceed’, or in other words, ‘be worse’ in a mixing zone, but only if this will not degrade natural habitat, public health or recreation.
Regional councils manage the mixing zone consent process and designate these zones. There are full details about mixing zones on Environment Canterbury’s website.
Clarity sampling
Watch a scientist show how to take water clarity readings:
What

This is usually a metre-long, clear acrylic tube, which is 50 mm diameter (44 mm inside diameter), and graduated along its length in centimetres. One end is clear for viewing—the other is open but can be stoppered with a matt black pipe cap. There is a 20 mm diameter black semicircle on a magnet so that it is in the centre of the tube. This can be slid along inside the tube using another magnet on the outside.
Care of your clarity tube
- Keep the viewing window of the tube free from scratches. An acrylic ring projecting beyond the window protects the surface to some extent, but it is a good idea to cover the end of the tube when not in use. For example, you could use a strong plastic bag secured by a rubber band.
- Keep the disc and magnet set separate from the tube when not in use—then you don’t risk dropping them onto the viewing window inside.
- Keep the black disc free of scratches. If paint chips off the edge, the resulting bright outline can make readings very difficult. You can repaint the disc using any matt black paint.
Where to collect the water sample
Try to collect the water from beneath the surface, so that you don’t also catch bits of floating material which make it harder to take a good clarity reading.
The water sample should ideally be collected mid-channel, if you are collecting from a waterway, but this may not always be possible.
Collect your sample from where the water appears to be flowing and well mixed, i.e. downstream of the “mixing zone”.
If you are sampling an SRP or DEB, take samples from either the outfall, or as close as possible to the decant outlet. If you are sampling dirty water flowing into an SRP or DEB, take the sample from immediately upstream of the forebay or entrance to the DEB.
How to take the water clarity reading
- Fill the tube with the water until it is full, then position the magnet with the black disc on the inside of the tube and facing the see-through end of the tube (with the screw head on the black disc facing the see-through end of the tube). Seal the tube with the bung.
- Move the magnet to the viewing/clear end of the tube (e.g. towards your eye).
- Hold the viewing end of the tube up to your eye and hold the tube out horizontally. Looking through the viewing end slowly move the magnet back along the tube until the black disc just disappears. Read the distance off the side of the tube and note it on your data sheet (under ‘Rep 1, disappear’).
- Push the magnet further down the tube.
- Hold the viewing end of the tube up to your eye and hold the tube out horizontally. Move the magnet towards you until the black disc just reappears. Read the distance off the side of the tube and note it on your data sheet (under ‘Rep 1, reappear’).
- Repeat steps 2–5 another two times (so that you have three replicate readings filled in on your data sheet). Between each set of readings you may need to gently agitate the tube a few times to suspend any particles in the water.
- Calculate the average of all the readings taken in the water clarity tube reading for that site.
- Take photos of your site—looking upstream and looking downstream from your point of collection and write the photo numbers onto the data sheet. Make notes of anything interesting/u
How to ensure you are taking an accurate clarity reading
- Be sure the clarity tube is washed out between sampling sites
- Avoid using the clarity tube in patchy light (e.g. lots of shadows) or dim light.
- It is sometimes easier to do the reading with two people (one to hold the tube horizontally), or find somewhere on site where you can balance the end of the tube to help you hold it horizontal
- Use a black permanent marker to colour in the silver screw-head on the black disc, so that this doesn’t distract you when taking your reading.
Total suspended solids (TSS)
Watch a scientist show how to sample water for total suspended solids:
What
Total suspended solids (TSS) are solids in water that can be trapped by a filter. TSS can include a wide variety of material, such as silt, decaying organic matter, industrial wastes and sewage. The dry-weight of the particles is a water quality parameter used to assess the quality of wastewater.
Using a TSS meter
There will be advice in the manual for your specific TSS meter, which you should follow. Here is more general guidance:
- Ensure your meter is calibrated correctly.
- Some meters need to be re-calibrated for different suspended sediment types in different waterways. Know how your meter performs to get reliable results.
Sampling
To take a physical sample for laboratory TSS analysis:
- Use an opaque plastic 1000mL bottle with no preservative
- Fill container to the neck of bottle, allow some air gap for mixing
- Be sure not to collect large clumps of detritus—sampling from just beneath the surface can help
- Use a sampling pole to keep yourself safe
- Clearly write the name location time and date of sampling on the bottle and record these details on a sampling record sheet.
Quick check tool for total suspended solids
Watch a scientist show an easy-to-use tool for quickly checking total suspended solids in water:
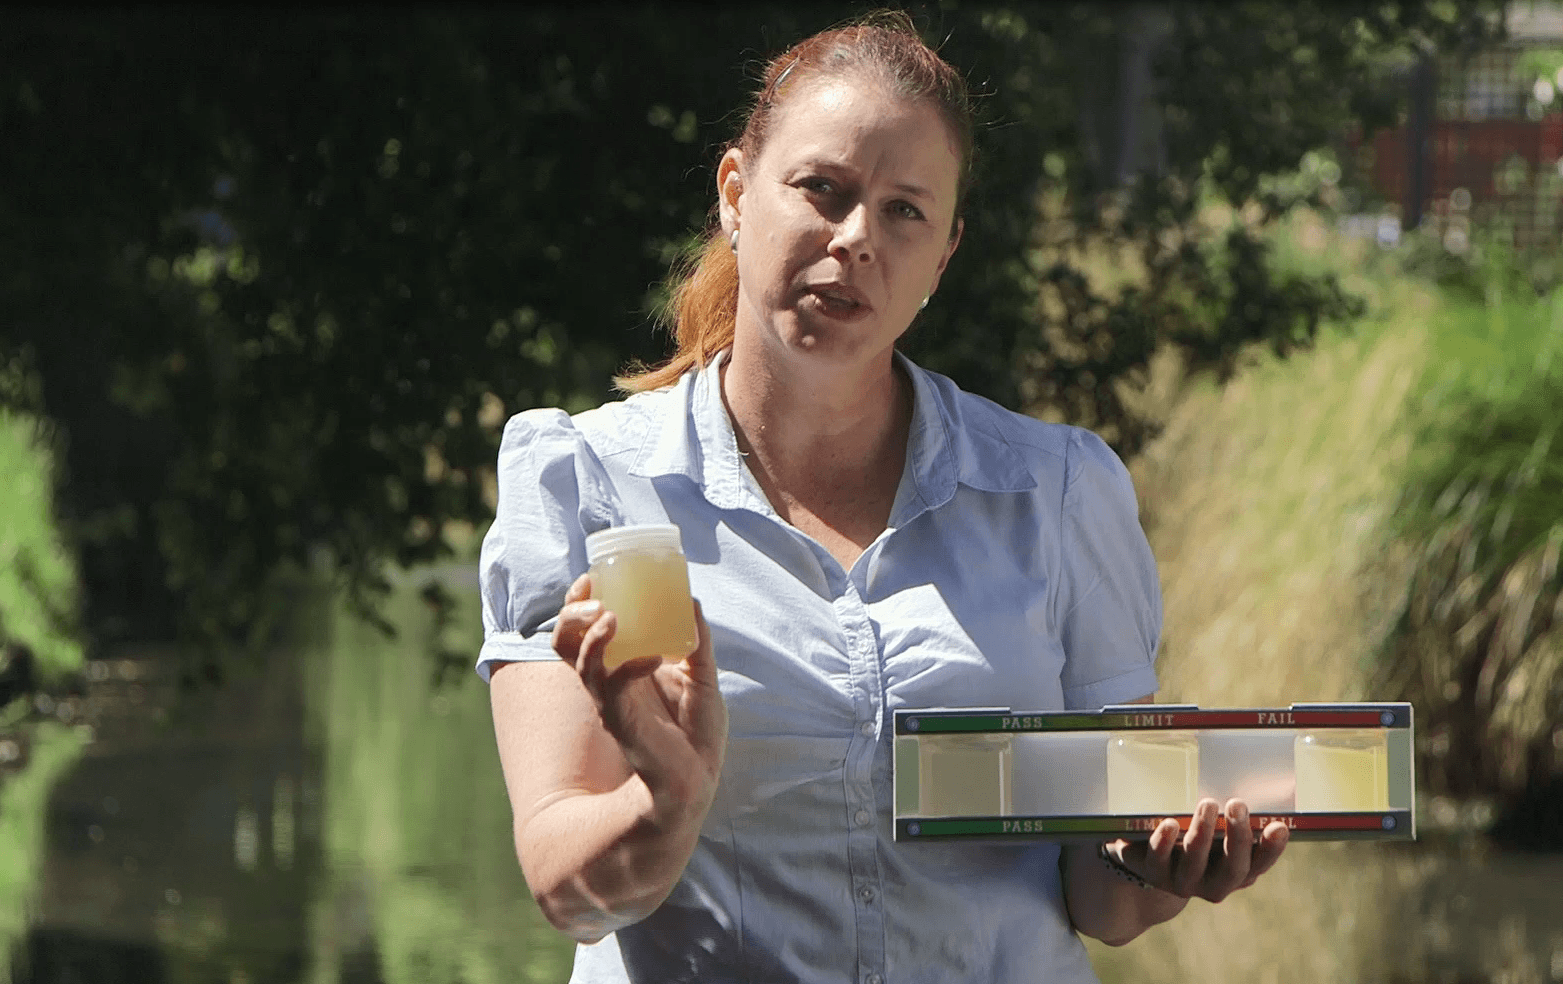
Checking total suspended solids quickly in the field with an easy to use tool.
You can use pre-assembled tools to help you determine whether compliance with water quality standards is being achieved.
These tools usually have an arrangement of 3 sample jars in a frame:
- A sample at the limit
- One below and
- One above the limit.
Visually comparing a sample from a site with each of the reference samples gives operators a quick way to determine whether the water complies with standards and can be discharged. Follow the supplier’s instructions to get reliable results.
pH
Watch a scientist explain how to use a pH meter and strips to test water pH:
When
Typically, pH is sampled when water has been treated with reagents to enhance sediment settlement. For many reagents the water’s pH must be within its effective range, otherwise the water may be unsuitable for discharge and not effective at settling sediment.
How
- Take the sample after the reagent has been well mixed into the water body so that it is a representative sample.
- Collect samples in an 500mL or 1000mL opaque bottle with no preservative for laboratory analysis, or
- Use a pH strip to check the pH of the sample once the sample in its container is on the bank or shore. Compare the colours of the strip until you get a match.
- Record results on record sheets.