Erosion Control
Soil and surface stabilisation practicesGeotextiles and erosion control blankets
What, why, when and issues to look out for
What
Geotextiles are permeable fabrics, which means that liquids or gases can pass through them. When used on soil, they can stabilise and protect them. They are also very useful for dust control.
Geotextile products include mats, plastic covers and erosion control blankets, and range from those that physically shed water to those that incorporate seed and mulch and support vegetation while protecting bare soil.
Geotextiles are usually categorised as either temporary biodegradable products or permanent non-biodegradable ones. Plastic covers are the main exception, as they are a temporary, non-biodegradable measure for covering stockpiles.
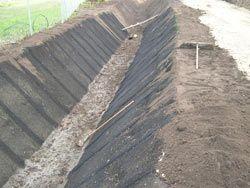
Erosion control batter blankets are a specific group of proprietary, rolled erosion control products, usually biodegradable. They provide an instant, short- to medium-term protective cover of the soil surface. They do this by shielding it from the erosive forces of wind, raindrop impact and sheet flows until a vegetative cover can be established or other stabilisation is done.
-
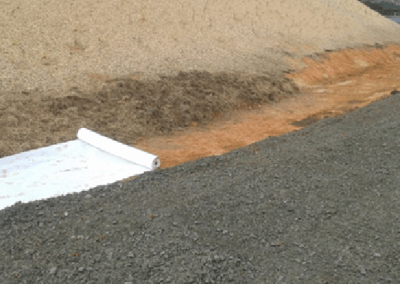
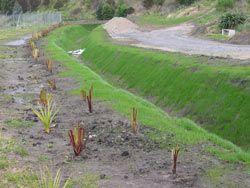
Stabilisation via a combination of chip mulch, geotextile and aggregate (Source: SouthernSkies).
-
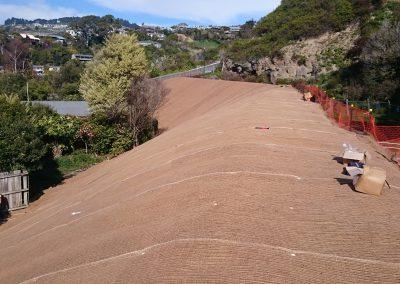
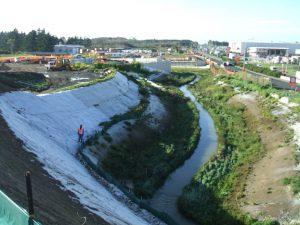
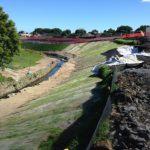
Erosion control blanket used to help protect erodible loess soil near Sumner. The slope needs vegetation to be stabilised. (Source RST Solutions Limited).
Why
Geotextiles instantly reduce the erosion potential of disturbed soil and/or reduce or eliminate erosion on critical sites from wind and water. They can be a permanent or temporary measure.
When
Geotextiles are mainly used on areas that are difficult to stabilise, for example:
- Important areas that are erosion-prone, eg construction sites, sediment retention pond outlets and inlets
- Channels (both temporary and longer-lasting) where the flow down the channel will erode the channel bed or bank. This is especially a problem on soft or dispersive soils like loess
- Areas lacking the room to install temporary sediment controls
- Areas slow to establish enough permanent vegetative cover. In this situation, the geotextile provides an early protective layer and helps maintain a higher soil temperature
- Short steep slopes, batters or stockpiles during periods of site inactivity
- Situations where there may be high runoff velocities or overland flow paths, because these flows will dislodge or erode conventional mulches
- When the downstream environment is of high value and rapid stabilisation is needed
Issues to look out for
Geotextiles have the following limitations:
- There are safety concerns for workers installing geotextiles on steep batters or where there is a risk of injury from falling or sliding. Other methods, eg spray-on copolymers, may be as effective and also keep workers safer
- Blankets and mats are usually not suitable for excessively rocky sites
- If you use geotextiles where the final vegetation will be mowed, the product must be 100% biodegradable – including the pins – so that there will be no problems with mowing in the future
- You must remove and dispose of temporary blankets and mats before applying permanent soil stabilisation measures
- Geotextiles do not generally provide the same level of benefit to soil quality as many of the traditional mulches like straw. Some geotextiles are prone to UV degradation, and most have a limited working life of 9 to 12 months
- Some geotextiles may contain a fine synthetic mesh or netting that can pose a threat to an aquatic species if used for stream channel and bank stabilisation
- Only use plastic to cover stockpiles or very small graded areas for short periods of time, until you can install alternative measures such as seeding and mulching
- Geotextiles, mats, plastic covers and erosion control covers have maximum flow rate limitations – consult the manufacturer
- Be aware of the potential for erosion of soils beneath the geotextiles, especially on steep loess slopes or in flow paths. Other methods may work better than geotextiles in these areas
Geotextiles and erosion control blankets: Design essentials
This section covers some essential points, but you should also always check the manufacturers’ product information sheets for specific construction specifications.
The geotextiles covered are:
Nonwoven geotextiles
- A general, temporary erosion control measure, useful for preventing raindrop erosion and scour from minor flows. They are often used to stabilise bunds, batters, stockpiles and low velocity channels.
- Their main advantage is that they can cling to the exposed surface.
- Their main disadvantage is their relative low strength. If you need a high strength geotextile (eg in high flows), use a woven geotextile.
Woven geotextiles
Woven geotextiles are used in high flow situations such as channels and flumes.
- The material should be a woven polypropylene fabric at least 0.4 mm thick and 3,700 mm wide, with minimum tensile strength of 0.67 kN, to meet ASTM Designation: D4632 (‘tensile’ means the ability to survive under the tension of being stretched, without ripping).
- The permittivity of the fabric should be approximately 0.2 s-1 to meet ASTM Designation: D4491 (“permittivity” in this case is how much water that can pass through the geotextile).
- The UV Resistance @ 500 hrs should be at least 70%, to meet ASTM Designation: D4355.
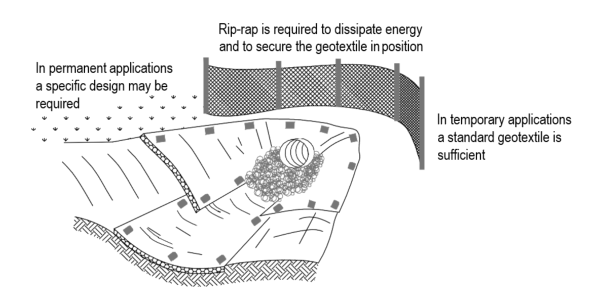
- Secure geotextiles in place with ground staples, pins or sandbags. Key them into the tops of slopes and edges so that surface water can’t get under them.
- Installation specifications:
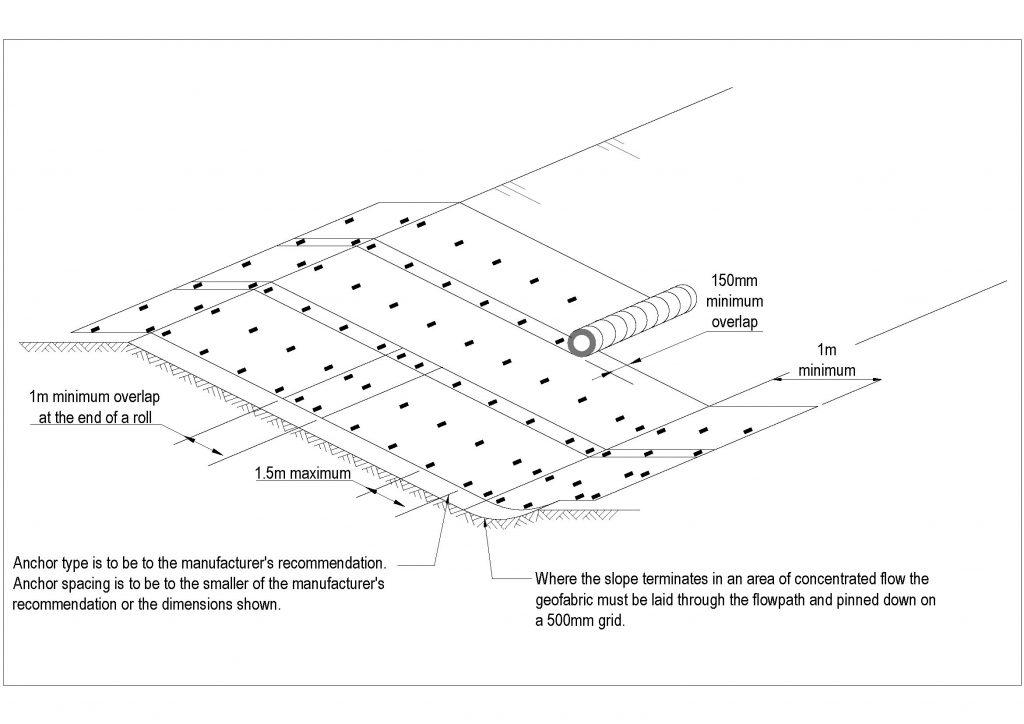
- Always pin geotextiles down on a 500 mm (min) grid. This will make sure that they contact the underlying soil at enough points. It will also stop wind from lifting the geotextile from the slope it is protecting.
- Use pins that are suitable for the geotextile and soil type.
Plastic covers
- Plastic covers stop any water from getting into the material covered. For example, they are useful for covering contaminated stockpiles, or material that is stockpiled for re-use.
- Plastic sheeting should be at least 0.25 mm thick. Key it in at the top of the slope. Hold it firmly in place by putting sandbags or other weights on it, no more than 3 m apart.
- Seams are typically taped or weighted down their entire length with at least a 300–600 mm overlap.
- Embed edges at least 150 mm into the soil.
Erosion control blankets/mats: Design essentials
Types of erosion control blankets and mats:
- Biodegradable rolled erosion control products
- Non-biodegradable erosion control products
- Combination synthetic and biodegradable products
Biodegradable rolled erosion control products
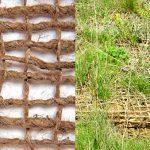
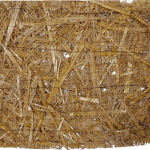
These products are usually made of jute fibres, curled wood fibres, straw, coconut fibre or a combination. To be 100% biodegradable, the netting, sewing or adhesive system that holds the mulch fibres together must also biodegrade. The types below meet these requirements.
Choose the type of product according to your site-specific conditions and the manufacturers’ recommendations.
It comes in rolled strips and needs to be secured to the soil with U-shaped staples or stakes, to the manufacturers’ recommendations.
Straw blankets come in rolled strips of at least 2 m wide, 25 m long and 0.27 kilograms per square metre (kg/m²).
Use U-shaped staples with 200 mm legs and a 50 mm crown.
The blankets come in rolled strips, which you secure to the ground with ground staples or pins, to the manufacturers’ recommendations.
Secure them in place with ground staples or pins, to the manufacturers’ recommendations.
The mesh comes in rolled strips which you secure to the soil with ground staples or pins, to the manufacturers’ recommendations.
Non-Biodegradable erosion control products
These materials are usually made of polypropylene, polyethylene, nylon or other synthetic fibres. Sometimes, biodegradable and synthetic fibres are combined to construct the material. The netting is usually non-biodegradable.
It is biaxially-orientated (it has two axes or directions). It comes in rolled strips and is photodegradable (it can be chemically broken down by exposure to light).
Secure it with ground staples or pins, to the manufacturers’ recommendations.
It is used with revegetation or to secure loose fibre such as straw.
The netting comes in rolled strips and you secure it with ground staples or pins, to the manufacturers’ recommendations.
The mats are designed to be revegetated and provide a permanent composite system of soil, roots and geomatrix.
It comes in rolled strips and is secured with ground staples or pins, to the manufacturers’ recommendations.
The mat’s tough root reinforcing system anchors vegetation and protects against damage from fast flowing waterway currents.
It can be installed over prepared soil, then seeded into the mat. Once vegetated, it becomes an invisible composite system of soil, roots and geomatrix.
The netting comes in rolled strips and is secured with ground staples or pins, to the manufacturers’ recommendations.
Combination synthetic and biodegradable products
The material comes in rolled strips and is secured with ground staples or pins, to manufacturers’ recommendations.
Erosion control blankets/mats: Construction, operation and maintenance
We have covered the following points when constructing and operating geotextiles and erosion blankets:
- Site preparation
- Seeding
- Anchoring
- Installation in channels
- Installation on slopes, including staple densities.
Site preparation
- Prepare the site properly to make sure that there will be complete contact between the blanket or matting with the soil. Remove all rocks, clods, vegetation or other obstructions. Grade and shape the area.
- If there will be seeding, prepare the seedbed by loosening 50–75 mm of the topsoil.
Seeding
- If your goal is to achieve erosion control and/or revegetation, seed the area before you install the blanket.
- If your goal is to reinforce existing turf, install the blanket then seed the area. All check slots and other areas disturbed during installation must be re-seeded.
Anchoring
- You can use ground staples or pins to anchor mats and blankets to the ground. Drive these in so that they are flush to (level with) the soil surface and deep enough in to resist pullout. If the soil is loose, you may need a longer anchor.
- The anchor you choose will depend on factors including whether the stabilisation is temporary or permanent (permanent might need biodegradable pins), soil conditions, and whether it will be subject to significant flow forces.
Installation in channels
Follow the manufacturers’ recommendations.
Installation on slopes
Install geotextiles and erosion blankets to the manufacturers’ recommendations, which will usually include a method like this:
- Start at the top of the slope and anchor the blanket in a trench that is 150 mm deep by 150 mm wide. Backfill the trench and compact the earth firmly.
- Unroll the blanket downslope in the direction of the water flow.
- Overlap the edges of any adjacent parallel rolls by 50–75 mm and staple every 1 m.
- When blankets must be spliced, put them end over end (shingle style) with 150 mm overlap. Staple through the overlapped area, approximately 300 mm apart, with the overlaps lying in a downstream direction.
- Lay blankets loosely and maintain direct contact with the soil. Do not stretch.
- Staple blankets sufficiently to anchor them and maintain contact with the soil. Place staples down the centre and stagger those with staples along the edges.
- Follow the manufacturers’ recommendation for spacing the staples or use the densities in Table 11:
| Slope | Minimum staple density |
|---|---|
| > 50% | 2.0 staples/m² |
| 50% to 33% | 1.5 staples/m² |
| < 33% | 1.0 staples/m² |
When maintaining geotextiles and erosion blankets
Inspect areas treated with temporary soil stabilisation daily and after each rainfall. Things to look out for are:
- The geotextile becoming damaged or dislodged in any way
- Rilling, which is erosion cuts that develop below the cloth because of water flowing under the geotextile
- Geotextile that is lifting because vegetation is growing up under the fabric
- Torn geotextile, missing pins or other damage caused by high winds, machinery or vandalism.
Reapply or replace geotextiles on exposed soils if the area becomes exposed or shows signs of erosion. If necessary, erect a temporary barrier and/or signage fencing to restrict uncontrolled movement of equipment and vehicles onto the treated areas.
